Check
Those Deck Fittings Out!
By marinechandlery.com/
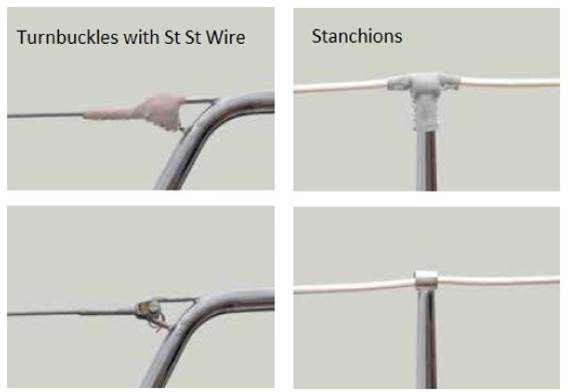
GUARD RAILS AND STANCHIONS:
How often do we grab guard rails without a moments thought, even though they are ‘staring us in
the face’ throughout the season, stanchions and guard rail wires are often items
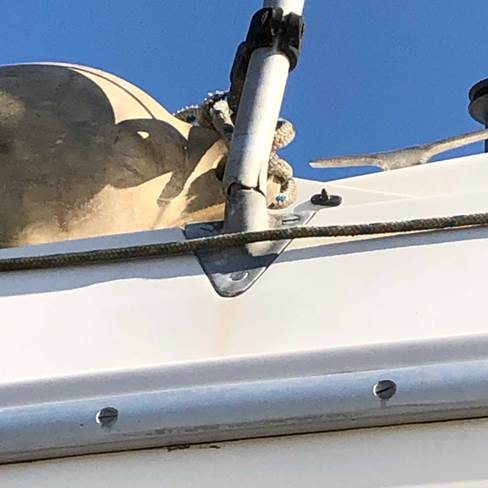
that are overlooked during pre-season checks. Stanchions should be
checked for security; make sure the base is fastened securely to the deck and/or toe
rail, and of course there is no movement and ALL fastenings are in place. An unstable base is not only
dangerous (it could possibly lead to a man overboard situation) but the mechanical
fastenings could be that elusive source of a leak into the interior
and often the ‘damp patch’ is some distance away! If the stanchion is secure but there is evidence of water
leaking into the interior of the boat, as a stop gap you could apply sealant round the base however the correct sure fire
way to sort is to remove the stanchion and re-fix as per our suggestions
below. If the base is found to be loose, remove, clean and re-fit using
the appropriate sealant, my recommendation is to go for a polysulphide,
such as Arbokol 1000 or Geocel 201 as against a silicone sealant.
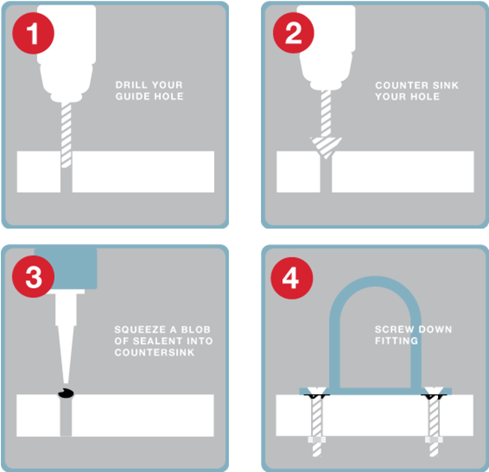
Before refastening a stanchion or any other deck fitting, make sure you
remove any old sealant using Debond Marine Formula. Degrease the fitting
and deck using acetone or similar and, if the hole is not
countersunk to accept the sealant do so. Finally, mask both the deck and the base so any excess sealant
that is squeezed out as you tighten down can easily be cleaned up.
However, when bolting down make sure that you don’t squeeze ALL the
sealant out, tighten, allow the sealant to set then go for a final turn
on the spanner next day!
Should there be an issue with the integrity of the
deck click here for further guidance.
Check stainless tubular type stanchions where they are drilled (for mid
height guard wire to pass through) for signs of stress cracks round the
hole. Make sure the stanchion is well secured into its base either by
bolt and lock nut or by split pin, however if an alloy stanchion is being
secured with a stainless fastening you must use a barrier such as Duralac or TefGel to prevent an electrolytic
reaction, same if you are using stainless stanchions in aluminium bases
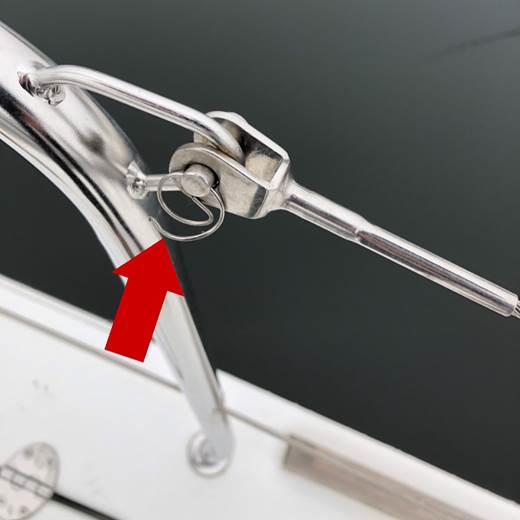
isolate between the two dissimilar metals. Terminating guard rails at the
pull or push pit, I prefer not to use split rings but beware split pins can be very sharp. They should be covered
in self amalgamating tape or have a blob of clear sealant applied to prevent snagging on
footwear, foulies, sails etc and of course
skin!
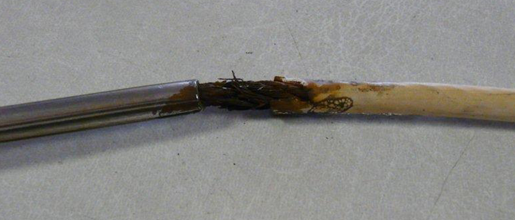
Guard rail wires should be carefully examined for
broken strands, especially where the wire exits the swage or Talurit termination and where they pass through
stanchions. You will have to slacken each wire and draw it through the
stanchion to fully inspect. Flex the wire gently at the start of a
termination or where the wire has passed through a stanchion, if any
broken or worn strands are found they MUST be replaced. It’s certainly
not recommended and highly dangerous to just tape over them! PVC
covered stainless steel guard rail wires (banned some years ago for use
on offshore race boats) can hide broken or corroded strands, especially
where the PVC cover butts up against swage or Talurit terminations. Moisture and a lack of oxygen provide the ideal scenario
for crevice corrosion to go unnoticed. Any signs of rust in these areas
can be a pointer to wire failure through weakening of the internal wire
strands – if rust stains are in evidence, replace without question,
preferably with uncovered stainless wire.
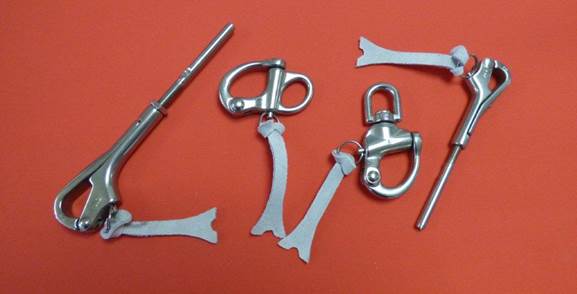
Ensure pelican hooks in gate assemblies are free to
operate, preferably single handed (leather pulls are worth fitting, saves you fumbling with
cold wet hands) and that the piston fully engages when closed.
Lubricate same with a dry film spray, Boeshield T9 or similar. Incidentally, if
your method of tensioning the guard rails is a cord lashing (which is our
recommendation as should you need to 'drop the wire' it's an awful lot
quicker cutting the cord) by the pushpit, we
would suggest that this is replaced on a regular basis. However I believe
current thinking is to leave the guard rail intact and bring the man
overboard over the guard rails! Check that all the clevis pins, rings or split pins in the assembly are secure and either
tape over using self amalgamating tape to avoid snagging,
or cover with those rather nice leather boots as shown below.
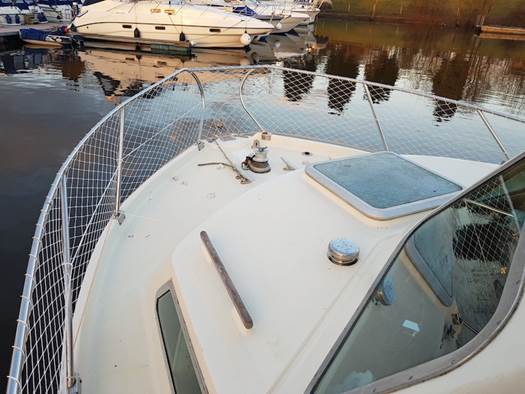
If small people or dogs etc are going to be found on
board this season and netting is already fitted, examine for signs of
degrading through UV exposure and check it is secured to both guard rail
wires and toe rail. There’s no point in fitting it if your precious cargo
can roll under the lower edge! Remember that saying 'there is no such
thing as a free lunch'. Cheaper netting is welded whilst the stronger
and, of course, more expensive netting is knotted!
JACKSTAYS:
Whether wire or webbing they should be inspected. Check wire termination,
especially PVC covered as per guard rail wires, for corrosion. Webbing jackstays should have their stitching
checked for integrity, if any nicks or cuts are found in the webbing or
if more than 3-4 years old they should be replaced owing to UV
degradation of the material and the stitching. If replacing wire
jackstays, consider changing to webbing as an alternative, it is kinder
to decks and doesn’t roll under ones foot.
DECK FITTINGS:
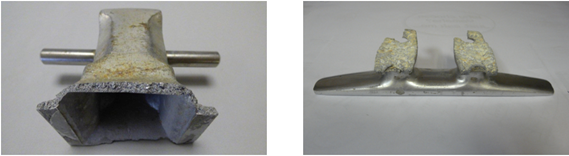
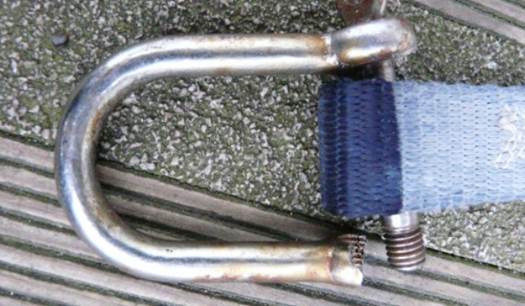
Mooring cleats, Fairleads, bollards, eye bolts or u-bolts, like stanchions, should be checked
thoroughly for movement. Should you suspect a deck fitting as a source of
a leak, as we said before the application of a bead of mastic round the
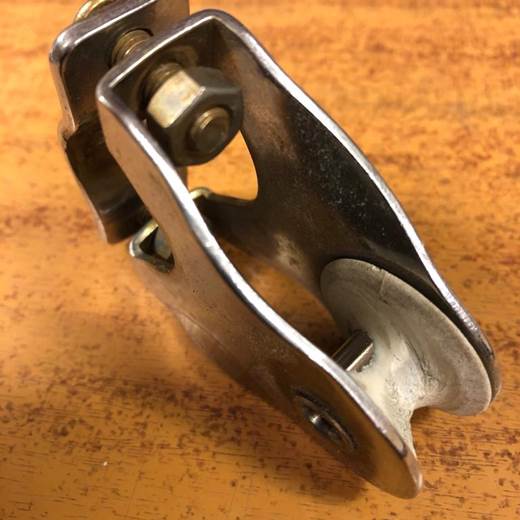
edge is only a short term solution! Any shackles securing a block or similar should all
be checked for wear and crevice corrosion then moused with either monel seizing wire or cable ties for
added security. However, if using ties and they have been snipped, watch
out for razor sharp edges, use a drop of silicone sealant to cover. Water in the fuel
last season, was it a 'dodgy' refill or is the fuel filler cap nitrile
seal past its sell by date? Spare seals are available for the Easy filler
caps and some other makes, however if sourcing a seal don't forget diesel
rots neoprene in double quick time.
BLOCKS, TRACK AND CARS:
Blocks, especially ball or roller types, should be
given a good rinse with fresh water from a hose to remove all traces of
grit. Lubricate ball bearing blocks using Harken’s OneDrop Ball Bearing
Conditioner or if plain bearing McLube. Don’t use grease as it will attract
and hold grit which makes a very effective cutting compound causing wear.
DO NOT oil or grease any Tufnol based block or
fitting as it causes the material to swell and will seize sheaves onto
pins. Any sheaves that are found to have wear between axle and the sheave
(either sideways or vertical play) or nicks in the edges of sheaves which
will cause damage to sheets or halyards should be replaced. Check
all cam jammers on mainsheet block systems if the
teeth are worn or the springs have lost their power replace. Rinse all
mainsheet and headsail cars especially those using ball systems using
fresh water, inspect for wear and lubricate as per blocks. If fitted with
plunger stops ensure these are free, lubricate with light oil and make
sure they locate correctly in the track system. Check all track
fastenings for integrity and make sure all track end stops are securely
fastened, any rubber pads within the stops should be replaced if worn.
WINCHES (HALYARDS AND SHEETS):
Winches should be stripped and cleaned of all
grease. If the grease is hardened it may be necessary to use paraffin and
a de-greasing agent. Inspect for wear, especially pawls (rounding of the
edges and cracking), check for play in all bearings and especially those
bearings between drum and the gearbox, if drum can be rocked excessively
the caged roller (or plain) bearing is most likely worn. Re-assemble
using winch grease, don’t use the white stern tube grease as it isn’t suitable for
the purpose, and don’t smother parts heavily, a light coating will
suffice. Keep grease away from pawls as it will make them stick, only
apply a drop of light pawl oil. Replace all pawl springs as a matter of course, a pawl that
doesn’t engage through a broken or worn spring subjects the other pawls
to overloading which can lead to damage. On self tailing winches check the rope gripper on the top of the winch for signs of wear,
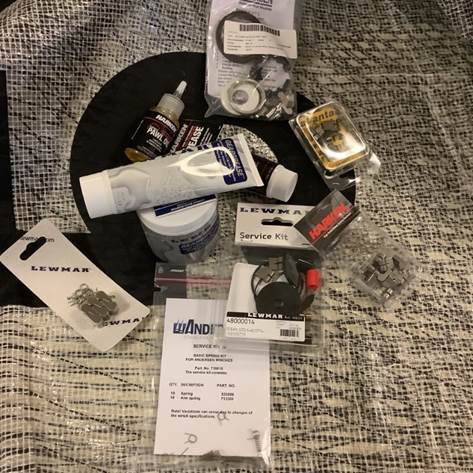
if worn replace. A manufacturer’s service kit is recommended as it
usually contains most parts that are required for a full service together
with an exploded diagram and instructions for stripping and rebuilding
the winch. Ex-Geordie Mark Gardiner who works for Harken often jetting
off round the world to service Volvo RTW winches and the like some years
ago kindly wrote an excellent article on winch servicing, click here to access. Rope clutches, often
neglected, should also be washed thoroughly and checked for holding
power, service kits are certainly available for
Spinlock, Easy Marine and Barton, cams and base plates are a source
of wear. Other makes of clutches please check with our staff for
availability of service kits/spare parts.
HEADSAIL FURLING A REEFING SYSTEMS:
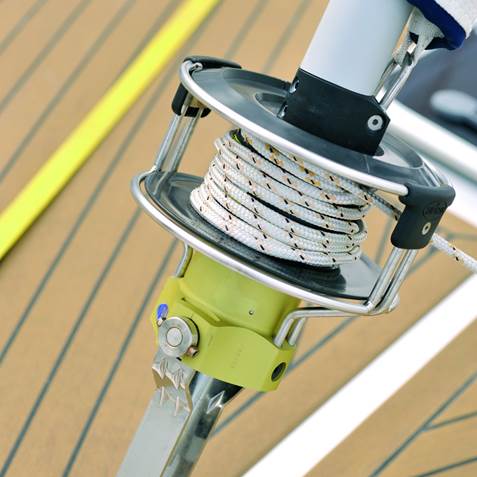
A good hosing out of both the upper swivel and the
lower drum unit will remove grit and salt deposits, check both items revolve
freely on their bearings, if not rinse again, DO NOT attempt to strip
swivels or drum units especially older Furlex units as you will almost certainly lose some of the bearings and possibly
damage the retaining circlip(s) during stripping, you may also find it
impossible to re assemble the unit without the use of a special press,
seek advice regarding this. Only grease systems according to the
manufacturers recommendations, some systems use grease, others recommend a dry type lubricant such
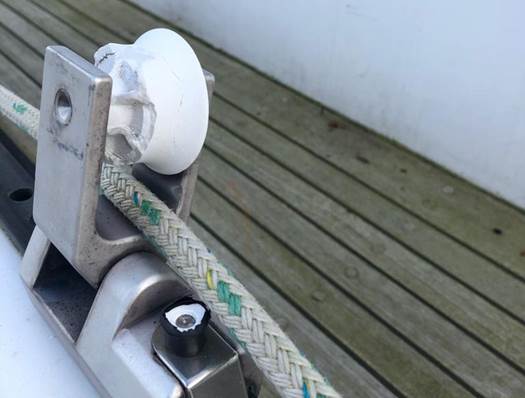
as McLube. Check the integrity of the furling
line especially the knot that secures it to the drum and most importantly
are the stanchion leads, if of the sheave type, running
freely and check for flats on the sheave. If you haven't introduced some
'friction' when unfurling the genoa to prevent a riding turn on the drum
why not consider a Harken or similar make of ratchet block complete with
becket (elastic tied to becket/guardrail to avoid it damage deck
or itself).
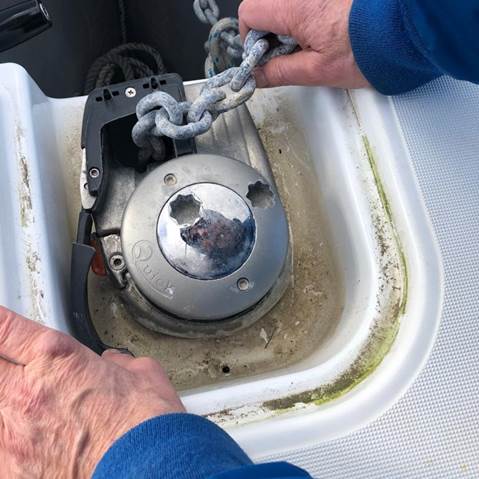
WINDLASS:
Last but not least don’t forget the windlass, out of
sight out of mind and you certainly don’t want it to fail if you have to up
anchor in a hurry! Despite having a great bunch of guys with a shed-load
of expert knowledge windlass servicing is not our forte so I make no
apologies for reproducing the following maintenance schedule courtesy of Lofrans. A. Clean all external surfaces and hidden
points with fresh water and remove all salt layers. B. Grease the
rotating parts, particularly, the main shaft threads and clutch cones.
Check for evidence of corrosion and mechanical stresses. A coat of Boeshield T9 is recommended. C. Remove
and clean the terminals of the electric motor. Coat terminals with
Vaseline before re-assembly, then when everything is back in place, spray
with Boeshield T9. Test the voltage drop at the
terminals. D. Replace all gaskets. E. Remove the anchor windlass from the
deck with a little help from Debond, clean all salt deposits and the like
from under the base and seal with polysulphide again.
Further Reading
cruising.coastalboating.net › DIY › PracticalGuides › ServicingWinches
Winches are perhaps one of the more crucial pieces of equipment on a sail boat. Receiving almost constant use in the case of the sheet winches, and being ...
www.coastalboating.net › News › 14-03-BoatUS
Inspect lower unit oil level and top up as necessary. Sailboat Rigging. Inspect swage fittings for cracks and heavy rust (some discoloration is acceptable). Inspect ...
